WARNING/DISCLAMER
THIS GUIDE HAS RISK INVOLVED INTO IT. IT MAY BRICK YOUR COMPUTER JUST LIKE HOW THE PENCIL BYPASS CAN. Any damages made is your own fault. Not mine, or others.
For this, you will be needing to BUY SOME ITEMS which cost about 10-15 dollars max on Amazon. If you don't want to buy items to deprovision your device, I suggest going to the SH1MMER/TN discord server instead to look for other methods
THIS GUIDE IS HARDER FOR PEOPLE WITH WSON-8 CHIPS AND IS VERY VERY RISKY FOR PEOPLE WITH WSON-8 CHIPS\
THIS GUIDE CAN ONLY BE DONE ON CHROMEBOOKS THAT ONLY HAVE FWMP DEV BLOCK. IF YOUR CHROMEBOOK HAS A BLOCK TO STOP YOU FROM BOOTING INTO DEV MODE(seperate from FWMP dev mode block), THIS EXPLOIT WILL NOT WORK AT ALL
why is it risky? well, since wson-8 chips have less exposed pins, you need to use a probe instead of a clip, which obviously does not clip compared to a clip, and therefore the chip could get disconnected anytime. i do not recommend this for people with wson-8 chips and attaching the probe to the chip to be very fair, you can modify a soic-8 chip clip to attach to a wson-8 chip, but im plain stupid and have no idea how to do that
Hello! If you are reading this, you probably are interested in flashing the chromebook's chip probably because you want to unenroll it (the main purpose of this guide). I have decided to make this document because I took a really long while just to gather some information on chip flashing and so I have decided to share what I have found as a guide. (personally i feel the pencil bypass is way riskier and requires a shim whereas this method doesn't require a shim and has less risk involved. nevertheless, it is still risky)
any issues? contact appleflyerv3 on discord
probably has alot because im writing this at 3am dont mind me :troley:
Step 1: Obtaining Necessary Materials and Files
Materials
First, you will need to buy a CH341a programmer that is basically a mini programmer that can read and program 24 and 24 series chips, as well as other microcontrollers, EEPROMs, and other memory chips. This is definitely a needed item in order to flash the chip.
You will also need a clip to clip onto the chip so that you can connect the programmer to the chip. For some chips, you might also need to have an adaptor that you can mount onto the programmer so that the computer can read and write on the chip.
In short terms, you will need
- A CH341a USB flash programmer
- A 1.8v adapter (needed for devices which use 1.8v flash chips.) (i dont know much about which chips need an adapter but I definitely know that GigaDevice chips need adapters)
- An SOIC-8 chip clip(for soic-8 chips)
- An WSON-8 chip probe(for wson-8 chips)
- a pc with linux on it(x86_64 architecture)
Files to Download
You will need to download/have
- linux pc duh
- flashrom
- gbb_utility
flashrom should already be installed on the computer(assuming ur running linux). if its not installed AND YOU ARE ON LINUX, open the terminal and do:
sudo apt update
sudo apt install flashrom
to install gbb utility, you need to download it from mrchromebox´s website. open your terminal and run:
wget https://mrchromebox.tech/files/util/gbb_utility.tar.gz 1 && tar -zxf gbb_utility.tar.gz
Preparation for the flashing is done. You may now move on to the next steps to flash your chromebook chip.
Step 2: Connecting the computer to your chromebook chip(guide for attaching SOIC-8 chip clips)
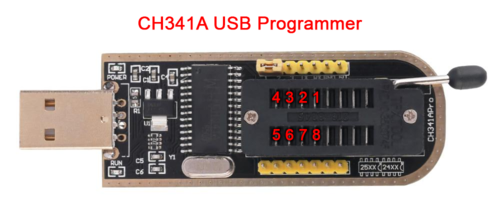
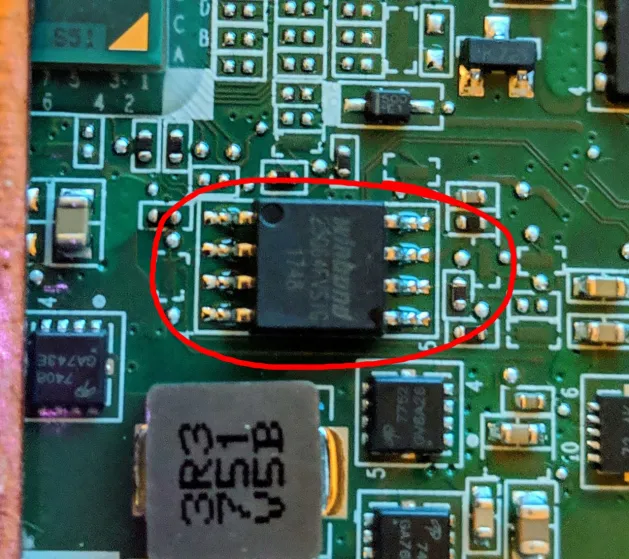
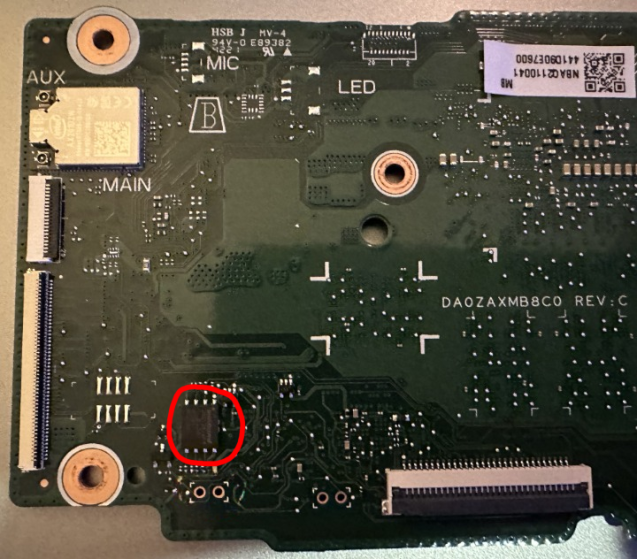
Firstly, connect the CH341a USB Programmer to the chip clip. Red wire goes connects to number 1 on the ch341a chip flasher(see image below). DO NOT PLUG IT IN WRONGLY. IT MAY RESULT IN YOUR COMPUTER BEING BRICKED. Next, open up your chromebook and look around the Chromebook motherboard and look for a small 8-pin chip with pins sticking out or in. These chips tend to have WINBOND or GIGADEVICE branding, and may either say 25Q64[xx] or 25Q128[xx] right below the branding. You may need to flip over the motherboard to find this chip.
in mrchromebox's words
Pin 1 of the flash chip will be notated by a dot/depression on the chip; be sure to align this with pin 1 on the chip clip wiring (a red strip on the example linked above).
Your Chromebook may have multiple of these chips, just look for the one that is most similar to the description stated.
Next, attach the chip clip to the programmer. The red wire should be connected to the pin nearest to the "dot" or indent at the side of the chip. Now, plug in the usb programmer into ur pc. You have now connected the chip to the computer and you are now ready to flash!


Step 3: FLASHING the WSON-8 chip
This is the most crucial step. Do not mess this up. If you do, you WILL BRICK your chromebook. Therefore, I recommend saving a copy of your current ROM.
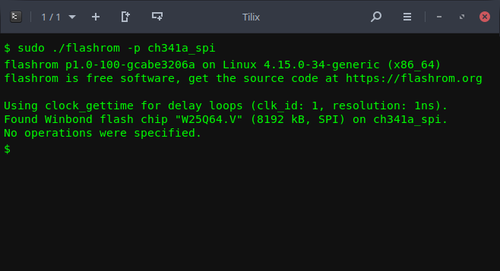
sudo flashrom -p ch341a_spi -r corebootBACKUP.rom
Now, we can flash the chip. First, create a copy of the ROM.
sudo flashrom -p ch341a_spi -r corebootmain.rom
Then, change the GBB flags(ensure that the gbb_utility file is in the same directory you are running this command in)
sudo ./gbb_utility --set --flags=0x80b1 corebootmain.rom
Save your ROM file.
sudo flashrom -p ch341a_spi -w corebootmain.rom
You have now completed the flashing. Remove everything you have attached onto the chromebook and screw everything back.
Step 4: UNENROLLMENT
Now are the most important steps to unenrollment. Even after re-enrollment, you will still be able to use SH1mmer after as the GBB flags have been modified for SH1mmer to work(supposedly)
- Boot into developer mode by doing
ESC+POWER+REFRESHand doingCTRL+D - Now, turn on the computer and do
CTRL + ALT + SHIFT + Rto powerwash. - After powerwashing, immediately go into the ChromeOS shell by pressing
CTRL + ALT + F2 (→) - Log into the user as: root, then run the following commands:
tpm_manager_client take_ownership
cryptohome --action=remove_firmware_management_parameters
- Press
CTRL + ALT + F1 (←)to exit out of the shell, then pressCTRL + ALT + Shift + Rto powerwash the Chromebook again. After powerwashing the Chromebook again and going through the setup, the Chromebook should no longer re-enroll and you may use it as a normal laptop.
if it fails, try downgrading to v110 if possible. if you can't, use E-Halycon instead.
IF SOMETHING GOES WRONG AFTER FLASHING
Things you can try
- connect ur flasher back duh and try to write your old ROM file back
sudo flashrom -p ch341a_spi -w corebootBACKUP.rom
- if it doesnt work still, try and use this guide
- still doesnt work, you probably fucked your entire chromebook up lol go and bring it to repair L
thanks for reading! information is not mine and i have merely compiled it. huge credit to darkn on this one lol. guide v2.1(B)
